How the Heck do you Report QTest results in Jenkins?
By: Brad
Hi Brad, I read your post QTest 101: Writing UnitTests for my Qt Application which was what I was looking for but what it didn’t show was how to report QTest results in Jenkins. How the heck do you do that?
Not a problem I can certainly go over how to do that.
For those unfamiliar Jenkins is an Open-Source Continuous Integration (CI) Server.
![]()
It is used to create a build job which includes a number of automated steps that one must perform to, well do something its rather open but its primarily used to build software. Jenkins has nearly 1000 plugins to allow it to perform a wide verity of automated steps such as checking out source code, building the software, analysis, testing, and reporting. I’ll go into further detail in another post suffice it to say its a fantastic tool.
The question here is how do I configure QTest and/or Jenkins so that I can (a) have Jenkins execute my tests and (b) see the results on the Jenkins web interface.
QTest
As stated in my last post QTest 101: Writing UnitTests for my Qt Application your tests are executed via a Test Harness application which is really just a console application. If you download the example application from that post and compile it you will find under the build-QtQuickSampleAppSolution-Desktop_Qt_X_X_X_XXX_XXbit-Debug\QtQuickSampleTest\debug folder the executable QtQuickSampleTest.exe.
If you run that executable you will get the following output:
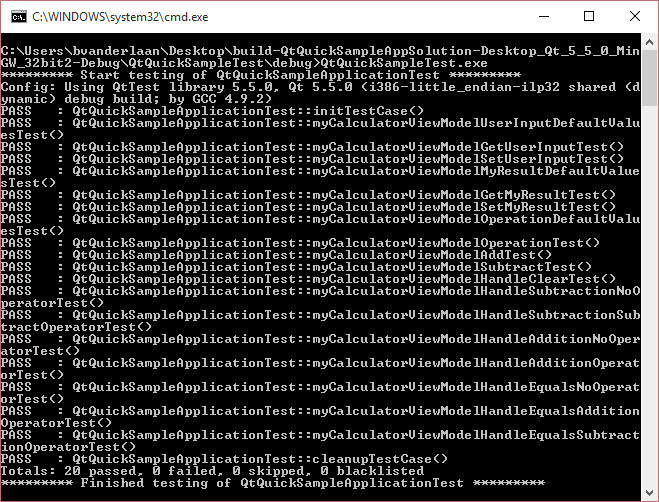
This output is the default format for QTest and is meant for humans to read. However if you want to feed the test results to another program XML is must more easily parse-able so that is the format we want generated so we can pass it to Jenkins for presentation on its WUI.
The good news here is that the QTest framework supports this. There are command line flags you can use when executing the executable to change the output format into XML.
- -txt This outputs the results as plain text. This is the default and is what is seen in the above screen shot.
- -xml This outputs the result as an XML document.
- -lightxml This outputs as a stream of XML tags but not an XML document. This is useful if you are concatenating multiple test results together into a single XML document.
- -xunitxml This outputs the results in the XUnit XML document format.
- -cvs This outputs the test results as a set of comma-separated value.
To use these simply execute the executable via a console like so:
…\debug>QtQuickSampleTest.exe -xml
This will output an XML document instead of the previously human readable text.
Alternatively you can configure Qt Creator to use one of these command line arguments when it executes the executable via the Project configuration settings. Ensure that you are on the Run settings vs. the Build settings then you will see the following fields. Add whatever arguments you choose to the Arguments field.
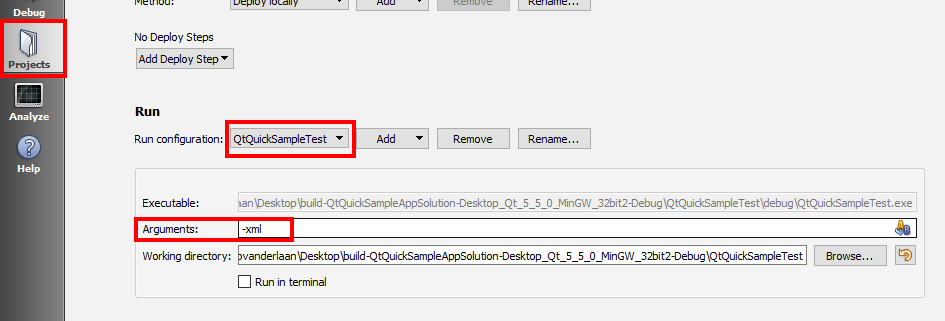
Now when you run your project (Ctrl+R) the Application output will show the selected format, in this case XML.
Here is an example of the output when using the xml flag:
    5.5.0
    Qt 5.5.0 (i386-little_endian-ilp32 shared (dynamic) debug build; by GCC 4.9.2)
    5.5.0
Here is an example of the output when using the xunitxml flag:
So now we know how to generate the test results in XML so that we can feed the data to Jenkins but how do we you know feed the data to Jenkins or for that matter have the data generated automatically with each build as right now all we know is how to generate the data manually.
Right right ok for that lets go over to Jenkins.
Commercial break...
Jenkins
As stated before Jenkins is a CI server which has access to about 1000 different plugins extending what actions Jenkins can perform. One of the actions you can program Jenkins to perform is execute a script; It can execute any number of scripts ANT, Batch, Bash, etc. This allows us great flexibility as with this one ability I can make Jenkins do just about anything. I try not to define to much of my build process within the inline batch/bash script fields in Jenkins as those steps can only be executed by Jenkins and its probably useful to allow those steps to be run manually by the developers so I generally have Jenkins simply execute script files which a developer can download (most likely from a source repository) and run manually on their dev machines however when it comes to simply kicking off my Test Harness this works just fine. I’ll do a follow up post going into more details about Jenkins but for now lets focus on the goal of this post.
How to I get Jenkins to execute my Tests after a build?
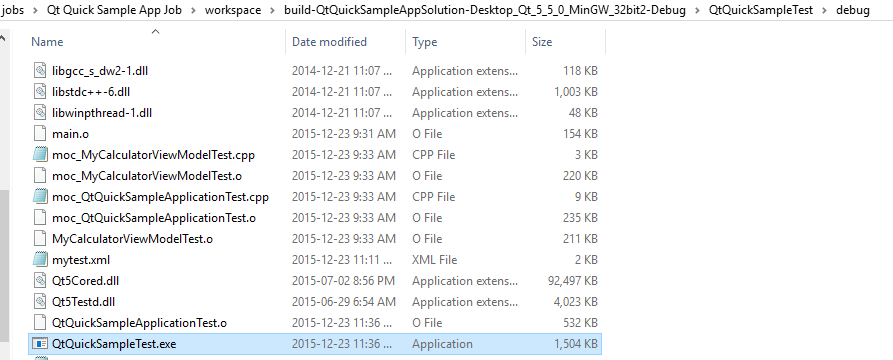
Lets assume you already know how to configure a Jenkins job and that this job is already building your application (in this case the QtQuickSampleAppSolution). This means that after your job is executed if you go to the working directory for the job on your Jenkins server you will find the QtQuickSampleTest.exe just sitting their.
What we need to do is tell Jenkins to execute it after its compiled but before the job terminates. We can do this by configuring a new build step using the Execute Windows batch command action (or Execute shell on Linux). I mean if the step we had to actually compile the software was stored in a batch/bash script or an ANT script which we told Jenkins to invoke we could just as easily update that script to run the test executable but lets say we didn’t or can’t for some reason so lets just tell Jenkins to run it for us; Either way we just need it to be run.

With this build step added we’ll see that same human readable text we saw at the beginning of this post printed out in the console output via the Jenkins WUI. That is great and all but wouldn’t it be better if the pass/fail results of our tests were presented on the main project page vs. buried in the console output and wouldn’t it be nice if we could fail the build if we have failed tests?
Enters one of Jenkins many many plugins.
How to get Jenkins to Report and Respond to Test Results?
Jenkins has an xUnit Plugin which extends Jenkins to be able to read test results and report on it via widgets on the main project page. It also allows Jenkins to be able to trigger a build failure if it finds failed tests. Note however that this plugin simply reads test data stored in an XML file it does not execute the test; we still need that build step we added above but now we need to modify it so that it not only outputs XML but stores it in a file that the xUnit plugin can read.
To do this lets use the -o flag and specify the xml format.

I’m using the xml format as the xunitxml format has never worked for me with the xUnit Plugin.
This will output the XML data that the xUnit plugin can read to a text file within our working space. Next we need to add the xUnit plugin step to our post-build section of our job and point it at this test data file.
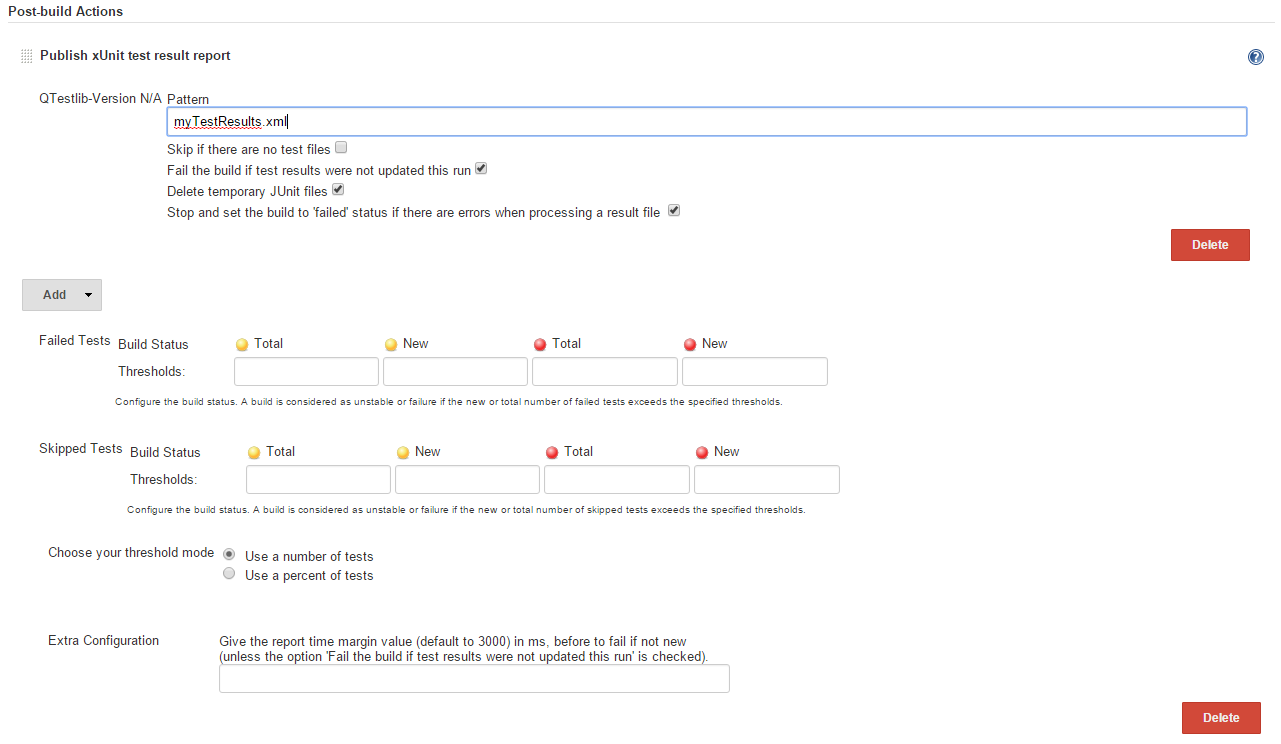
To do this scroll down to the Post-build Actions section of your job’s configuration and select Publish xUnit test result report from the Add post-build action drop down. This will add new fields to the Post-build Actions section; from here notice the new Add drop down. In the Add drop down select QTestlib-Version N/A; this will add a new field called QTestlib-Version N/A Pattern where you can input the name of the XML file the xUnit Plugin should read in order to find the test result data.
Now that we are executing the Test Harness and storing its results as XML data in a text file and that we are also using the xUnit plugin and have told it to read the text file we just generated Jenkins is now able to validate the results of our tests and report on them.
If we look at the console output we will no longer see the human readable text, we won’t see anything indicating the result of the tests any more but we will see text from the xUnit Plugin stating that it found the test data:
[xUnit] [INFO] - Starting to record.
[xUnit] [INFO] - Processing QTestlib-Version N/A
[xUnit] [INFO] - [QTestlib-Version N/A] - 1 test report file(s) were found with the pattern 'myTestResults.xml' relative to 'C:\Program Files (x86)\Jenkins\jobs\Qt Quick Sample App Job\workspace' for the testing framework 'QTestlib-Version N/A'.
[xUnit] [INFO] - Converting 'C:\Program Files (x86)\Jenkins\jobs\Qt Quick Sample App Job\workspace\myTestResults.xml' .
[xUnit] [INFO] - Check 'Failed Tests' threshold.
[xUnit] [INFO] - Check 'Skipped Tests' threshold.
[xUnit] [INFO] - Setting the build status to SUCCESS
[xUnit] [INFO] - Stopping recording.
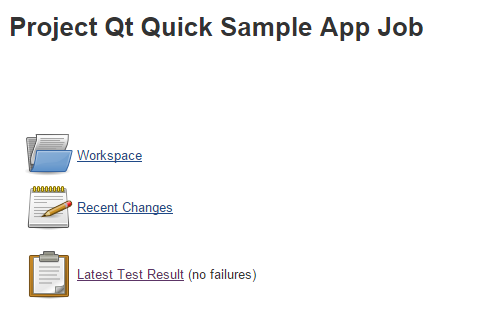
If we go to the main project page or to the particular build’s page we will now see a new link for the Last Test Result.
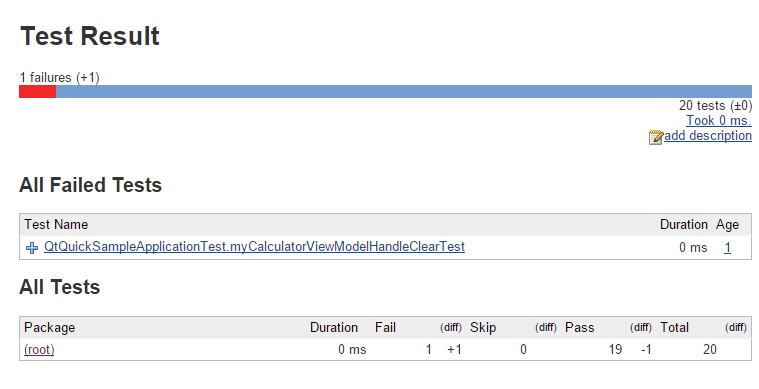
Here we can drill down into the tests to get information such as which tests failed and how long each tests have run. Here is an example of a test report summary which has one failed test. We can click on the (root) link to drill down even further to see the result and run duration of each test.
When you have run your job more then once Jenkins or rather the xUnit Plugin will collect and graph the difference between test runs. This can be useful to track an increase in failing tests over time.
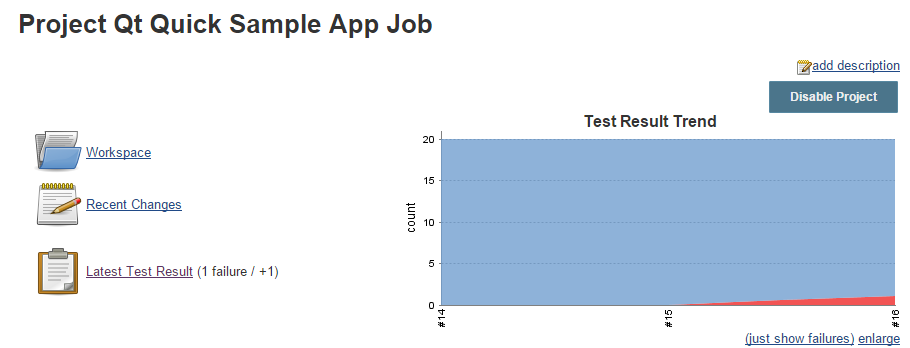
In the above image I have two test runs where in the second test run one test failed. You can see that Jenkins is reporting that one new test has failed and that you can now see a red sliver showing up in the graph.
So there you have it, that is how you can configure your Jenkins job to execute your QTest Test Harness in a way to generate test result data and which of Jenkins many plugins you can use to analyze and report the results of your tests.
Thank you I hope you have enjoyed and found this post helpful. Feel free to leave any comments or questions you might have below and I’ll try to answer them as time permits.
Until next time think imaginatively and design creatively