Qt Quick Performance Tips – Clipping
By: Brad
In this blog series I’m listing out different performance tips and tricks for Qt Quick to make sure you’re getting the best performance out of the scene graph renderer. In this post let’s talk about Clipping.

All QML components that extend from Item ( i.e. QDeclarativeItem ) has a property called clipping. This property tells the scene graph not to render any child elements which extend beyond its parent boarders.
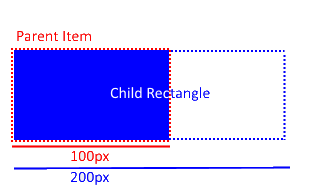
Example; Say we have an Item with its clipping property set to true and a width of 100. Now that Item has a child Rectangle with a width of 200. Because the Rectangles parent (Item) has its clipping set to true the scene graph renderer will not draw the right most 100px of the child Rectangle.
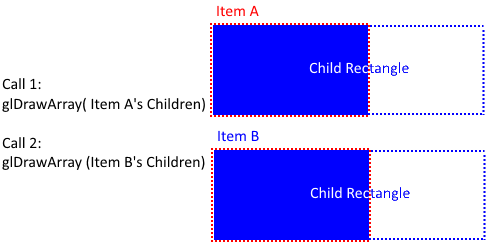
This sounds great and all and you would expect greater performance however any items with its clipping property set to true means that its sub tree (i.e. its child elements) needs to be in its own OpenGL state preventing the ability to batch multiple components together into the same state. This means that the child elements can’t be drawn at the same time with the same call to glDrawArrays() as child elements of Items siblings. If we had two Item elements side by side our Item (Item A)’s children would be rendered with one call to glDrawArray() and the other Item (Item B)’s child elements would be rendered by a second call to glDrawArray(). If we set both items clipping property to false on the other hand both sub trees would be able to be placed within the same OpenGL state and therefore drawn together with one call to glDrawArray().

The take away here is that you should try your best not to use clipping if you can help it; this will allow the renderer to batch draw commands together and speed up performance.
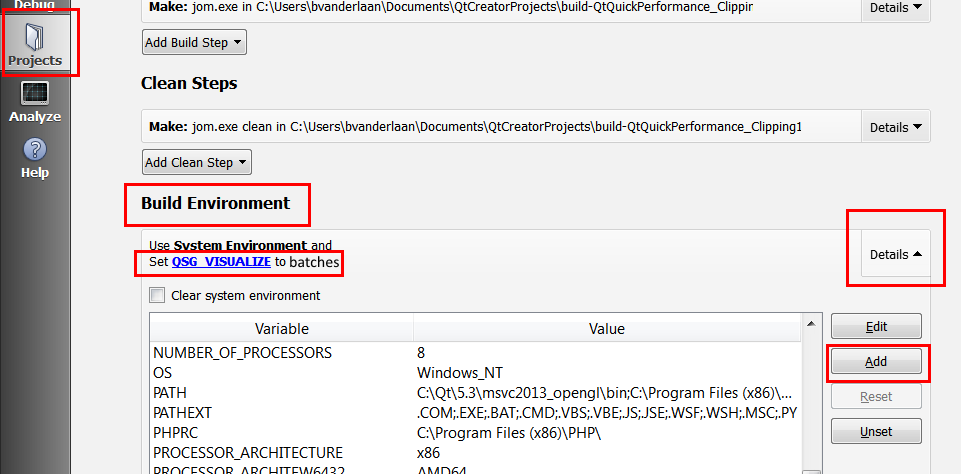
In order to visualize how many clipping regions your application has, set the environment variable QSG_VISUALIZE to clip. This will colourize your UI to show you the different clipping regions.
You can do this in Qt Creator by going to the Projects tab, expand the Build Environment section, click Add, then enter as the variable name QSG_VISUALIZE and set the value for that variable to clip.
Hope that helps,
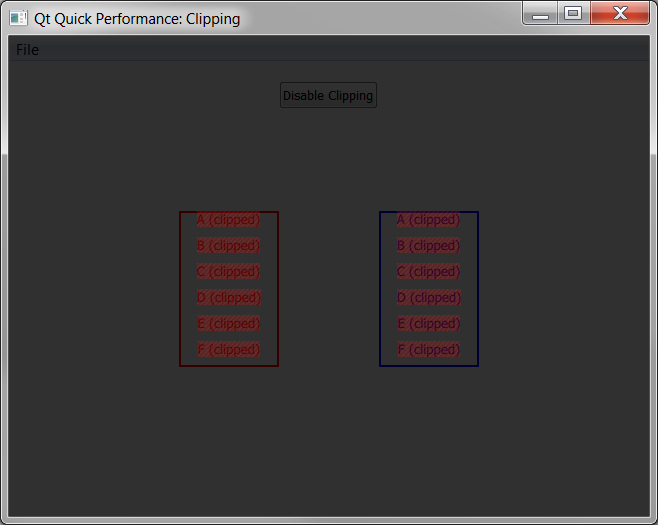
You can download a sample application which allows you to toggle on and off clipping on two lists so you can see the regions get colourized (note with the QSG_VISUALIZE environment variable set to clip the application will be rendered with the whole application dimmed, note that you can still interact with controls in the UI. In the sample application there is a button at the top of the window that you can click while viewing the clipping regions to toggle off the clipping property of the list delegates to see in real time how that effects the application) here:
Until next time think imaginatively and design creatively